After a little thought, though, I decided that it would be better if I started off with something a little easier. Having a partially Scandinavian ancestry, making a batch of mead was the obvious choice. Extensive research was in order before I could begin, though. So off I went to the T.V. repair shop.
There's a place close to me called Graf TV. Been in business a long time. When the original owner retired, he left the care of the shop to his two sons. One of them had an affinity for home brewing, so he started selling a small amount of brewing supplies from a corner of the shop. As time went by, this corner grew until it took over half of the store. So now it's a home brewing supply shop with a television repair side business. They actually sell the kit that came into my possession, so that made them the logical choice for advice.
I entered the store one sunny afternoon. It was busy. I finally caught the owner, Jeff, in between customer interactions. "I need some advice, " I explained. "I have one of your kits, and I'd like to make some mead. Where do I begin?"
"Take three gallons of water, nine pounds of unprocessed honey, and a packet of Red Star champagne yeast. Put it all in the bucket, put the lid on it, and don't touch it for a at least a year."
Now I completely understand that these undertakings require patience and perseverance, but I'm not necessarily the most patient man in the world. "What if I can't wait that long?" I countered.
"Ahh, give it about three months. At least until a couple weeks after the airlock stops bubbling."
"That's more like it. It's that simple, though? Water, honey, and yeast?"
"It's that simple."
"Sweet. Yeast me."
With my pack of Red Star yeast in hand, I scampered back to headquarters, and brought all of my accoutrements to the
Honey, water, yeast, stirrer, hydrometer, sanitizer, airlock, bucket lid.
This is the honey I used. The two on the right were completely organic, non-filtered, and kind of expensive. This being my first foray into fermenting honey, I filled my quota with the stuff on the left, Spille's honey. Sourced from a local apiary, (that's what they call bee farms! I'm smart!) it was a little more processed, but more affordable. Kinda funny how the less work you do, the more you charge. I can't believe that kind of logic doesn't translate to other industries. "I only cut one square foot of your lawn, but I did it with scissors. That's organic! Your bill is $120."
Now that I got that off my chest......
Water and yeast,
 |
| Better get a bucket 'fore I throw up.... |
And the bucket. Normal five gallon-variety. You could seriously take a homer bucket from the depot, drill a hole in the lid, add a grommet and an airlock, and be good to go.
Stirrer, Airlock, Hydrometer, Sanitizer. For that not-so-fresh feeling.
 |
| Commie Yeast! |
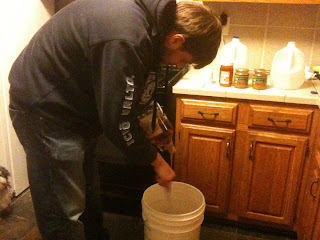
Here's my sexy ass mixing up some delicious Meady goodness.
Didn't get enough the first time? You're welcome.
The (semi) final product.
Closer picture.
And here it sleeps. I think I lasted three weeks until I tried it. Not too shabby. My friend took one look at it and said, "That looks like swamp water!" He was right, the organic stuff gave it a greenish tint. After a glass though, he was a fan. Also, I let my sisters and mom give it a go. They occasionally enjoy wine, so I was interested to hear their opinion. They said "Oh, this isn't bad at all!" which is actually a compliment. More importantly, they finished their glasses.
I finished it off in about four months. I didn't bottle it, and it got pretty gross near the end. Still, though, all in all, a successful venture.


